vagrant指北
Vagrant安装&配置
An error occurred while downloading the remote file. The error message, if any, is reproduced below. Please fix this error and try again
安装
可通过官网下载安装地址下载安装。
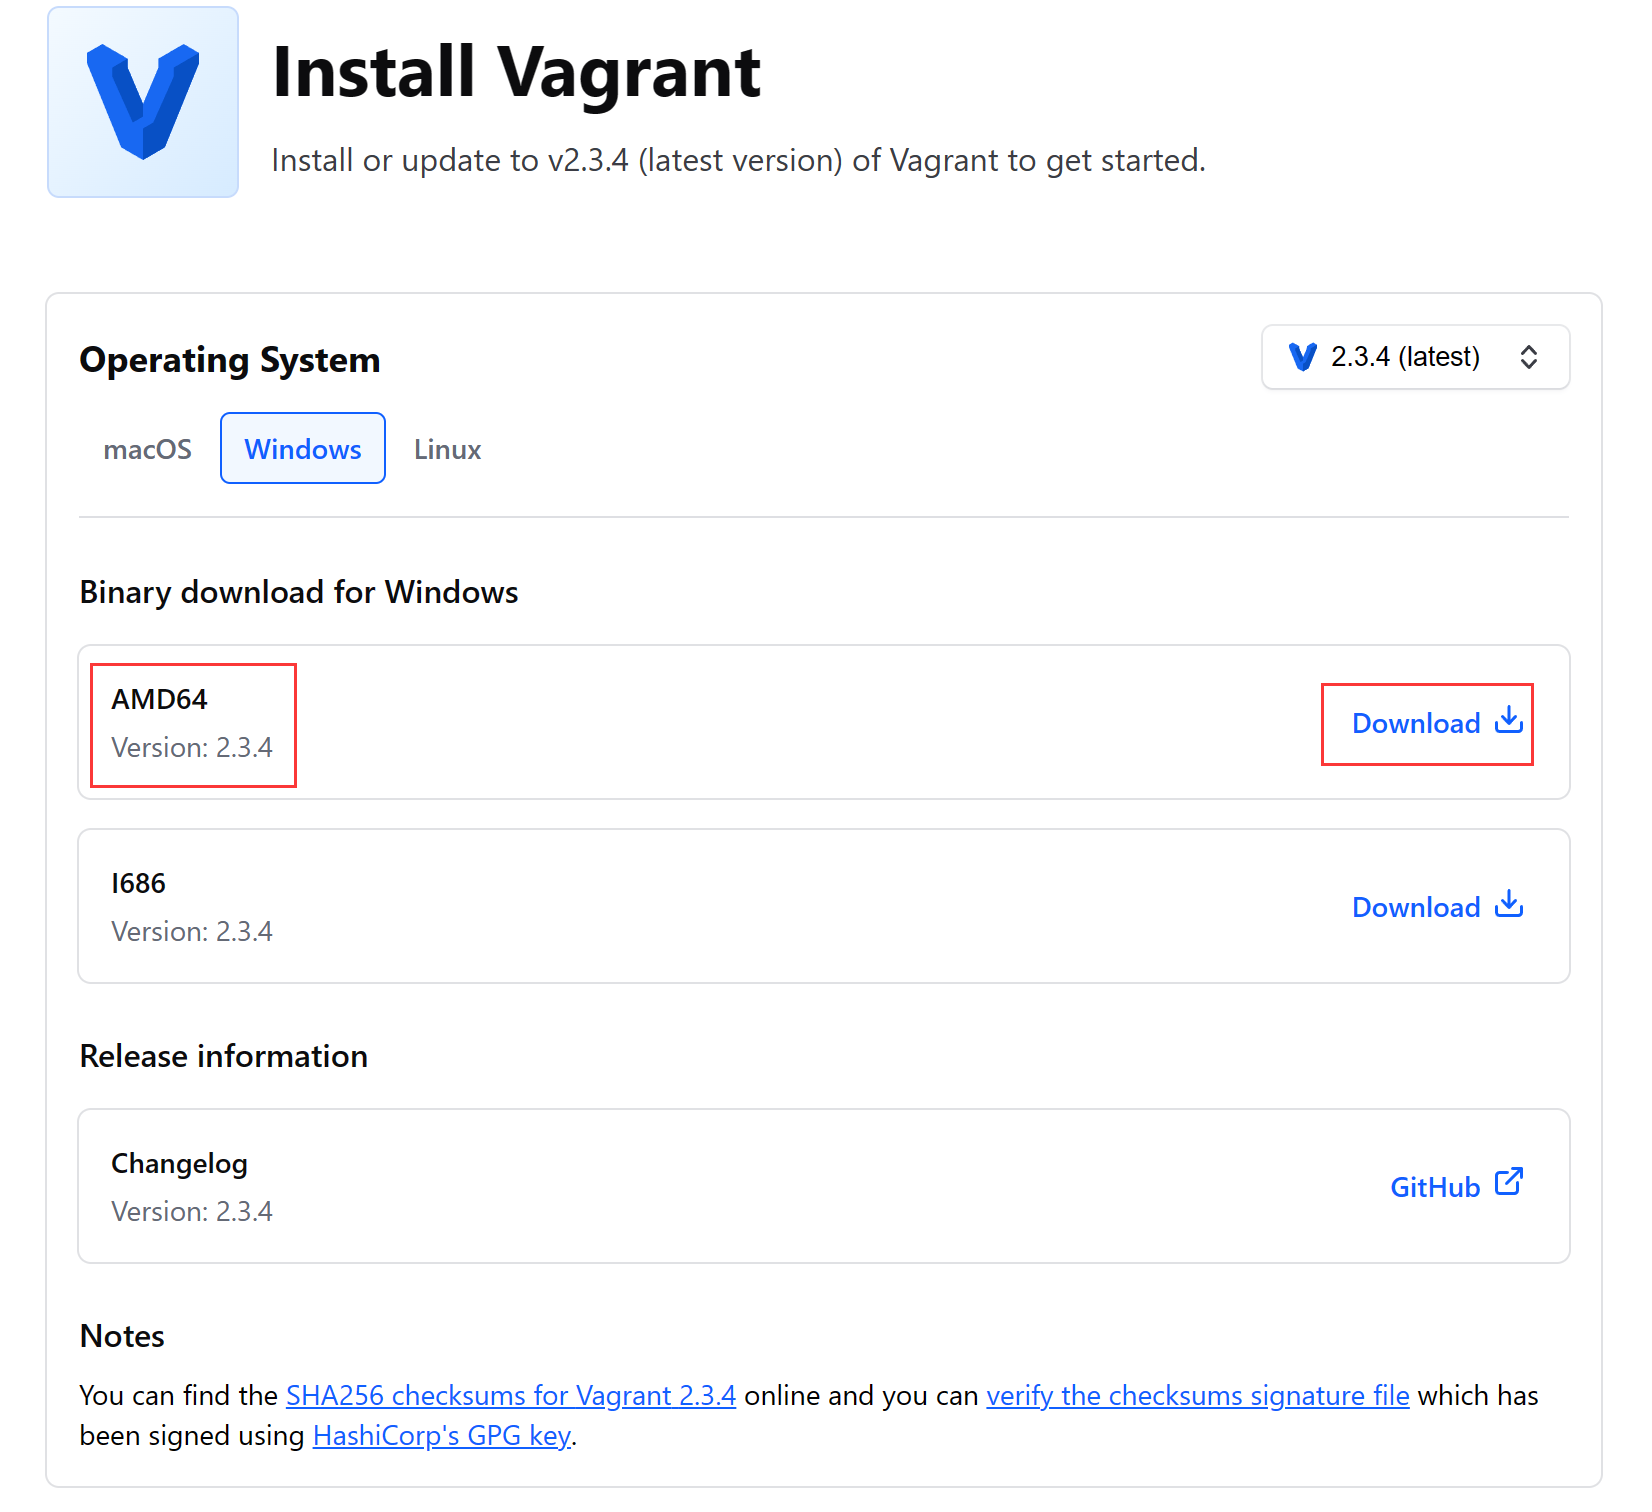
windows10安装
选择AMD64版本,下载得到exe文件后双击打开安装即可。
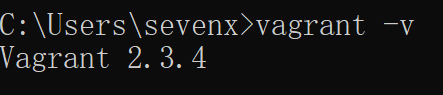
验证安装
控制台输入vagrant -v查看版本,可验证是否安装完成,正常输出版本如下:例如我的版本是2.3.4
配置VMware插件
安装vagrant-vmware-desktop
前提:安装完成vagrant后
执行命令安装vmware插件
1 | |
稍等几分钟后出现如下提示则安装完成

安装Vagrant VMware Utility
下载页Install | Vagrant | HashiCorp Developer
windows10选择X86_64版本下载后双击安装。
基础使用配置
初始化
通过简单的几个vagrant命令即可快速初始化一个虚拟机
1 | |
<<<<<<< HEAD
### 问题集合
常用操作
1 | |
时间同步
228ea1bf0a6fba68ec563ecd720756c6d6913775
vagrant up报错:Vagrant encountered an error while attempting to load the utility service key file.
Vagrant encountered an error while attempting to load the utility
service key file. This error can occur if the Vagrant VMware Utility
has not yet been installed, or if it was installed incorrectly. If
this error persists after running the Vagrant VMware Utility installer
again, please contact support at: support@hashicorp.com
Information about the Vagrant VMware Utility, including installation
instruction, can be found here:
https://www.vagrantup.com/docs/vmware/vagrant-vmware-utility.html
Path: C:/ProgramData/hashicorp/vagrant-vmware-desktop/certificates/vagrant-utility.client.crt
Error: No such file or directory @ rb_sysopen - C:/ProgramData/hashicorp/vagrant-vmware-desktop/certificates/vagrant-utility.client.crt
原因:
未安装Vagrant VMware Utility。
解决:
参考上面安装Vagrant Vmware Utility
连接
vagrant up启动虚拟机后,可通过
1 | |
ssh连接虚拟机,去除了繁杂的密码密钥等,交由vagrant管理。
配置网络
配置hostname
1 | |
配置ip
由于VirtualBox默认的虚拟机策略为网络地址转换,此策略对于后续的程序安装,需要访问时,都得转换一次端口,较为麻烦。为给虚拟机分配一个独有的ip地址,可通过vagrant配置文件指定。编辑虚拟机的Vagrantfile文件,加入如下行
hostname: true启用hostname
1 | |
保存后,执行vagrant reload命令重新加载配置,通过ip addr命令可查看虚拟机当前ip地址
基础命令
1 | |
查看端口监听
1 | |
问题合集
1. vagrant up faild、在线安装慢
在首次执行vagrant up时需要下载centOS镜像,由于网络问题可能会下载失败或者下载很慢。这时候可以手动把镜像下载到本地,再通过add命令加载镜像到vagrant,再使用up命令即可跳过下载步骤
镜像搜索:https://app.vagrantup.com/boxes/search
Centos/7:https://app.vagrantup.com/centos/boxes/7
下载镜像后通过命令添加到vagrant:
1 | |
此时再通过vagrant up命令安装启动虚拟机就不需要下载了,速度较快,推荐
2.code NS_ERROR_FAILURE (0x80004005), component ConsoleWrap, interface IConsole
1 | |
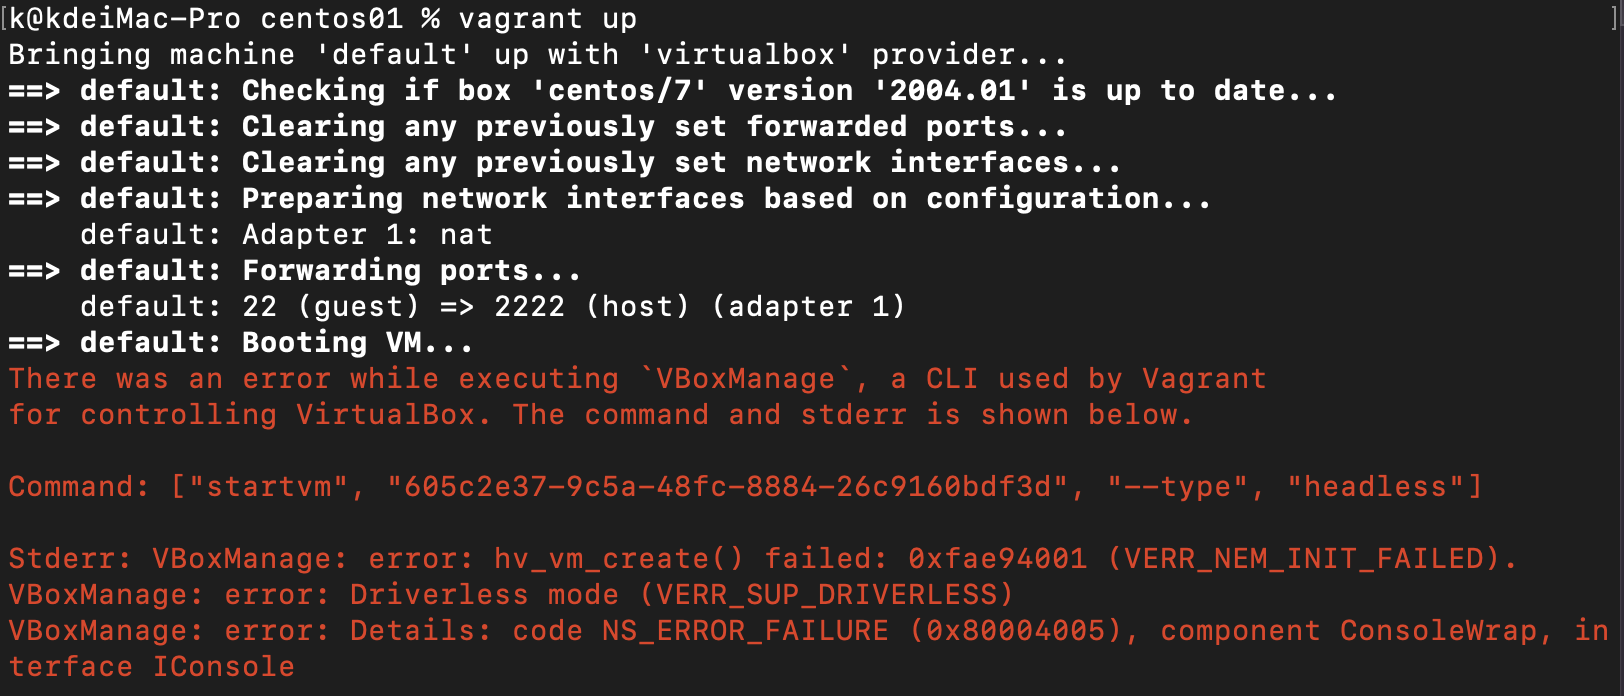
原因之一:AMD好像只支持到6.1的vbox,卸载7.0安装6.1的,然后在隐私项勾选oracle,确认重启搞定。
Is the docker daemon running?
docker服务未启动,
1 | |
3.ping time out
配置了ip无法连接,检查配置的ip是否和主机处于同一网段
本博客所有文章除特别声明外,均采用 CC BY-SA 4.0 协议 ,转载请注明出处!